How to Make Homemade Coconut Yogurt
Homemade coconut yogurt is easier than you'd think, requiring just two ingredients. Keep reading for the step-by-step process of how to make coconut yogurt from scratch at home!

Note: Please make sure that you read through the entire instructions in this post. Yogurt-making can sometimes be finicky, so you'll want to follow these steps as closely as possible. You can also read through the Troubleshooting tips at the bottom of this post if needed.
I did a poll on my Instagram stories last week and 94% of you have never made coconut milk yogurt at home! Which I completely understand. It's not usually on the top of our to-do list, plus the idea of making homemade yogurt sounds tedious and inconvenient.
Except it's not. Like, at all.
I'll admit it's been a while since I've made a batch o' homemade coconut yogurt but I forgot how ridiculously simple it is. 2-ingredient kinda simple!
Why I Love Coconut Yogurt
Rich in probiotic bacteria for happy digestion
Loaded with healthy fats for energy, balanced blood sugar, skin and cognition
Rich, creamy, and super versatile

What you Need to Make Homemade Coconut Yogurt
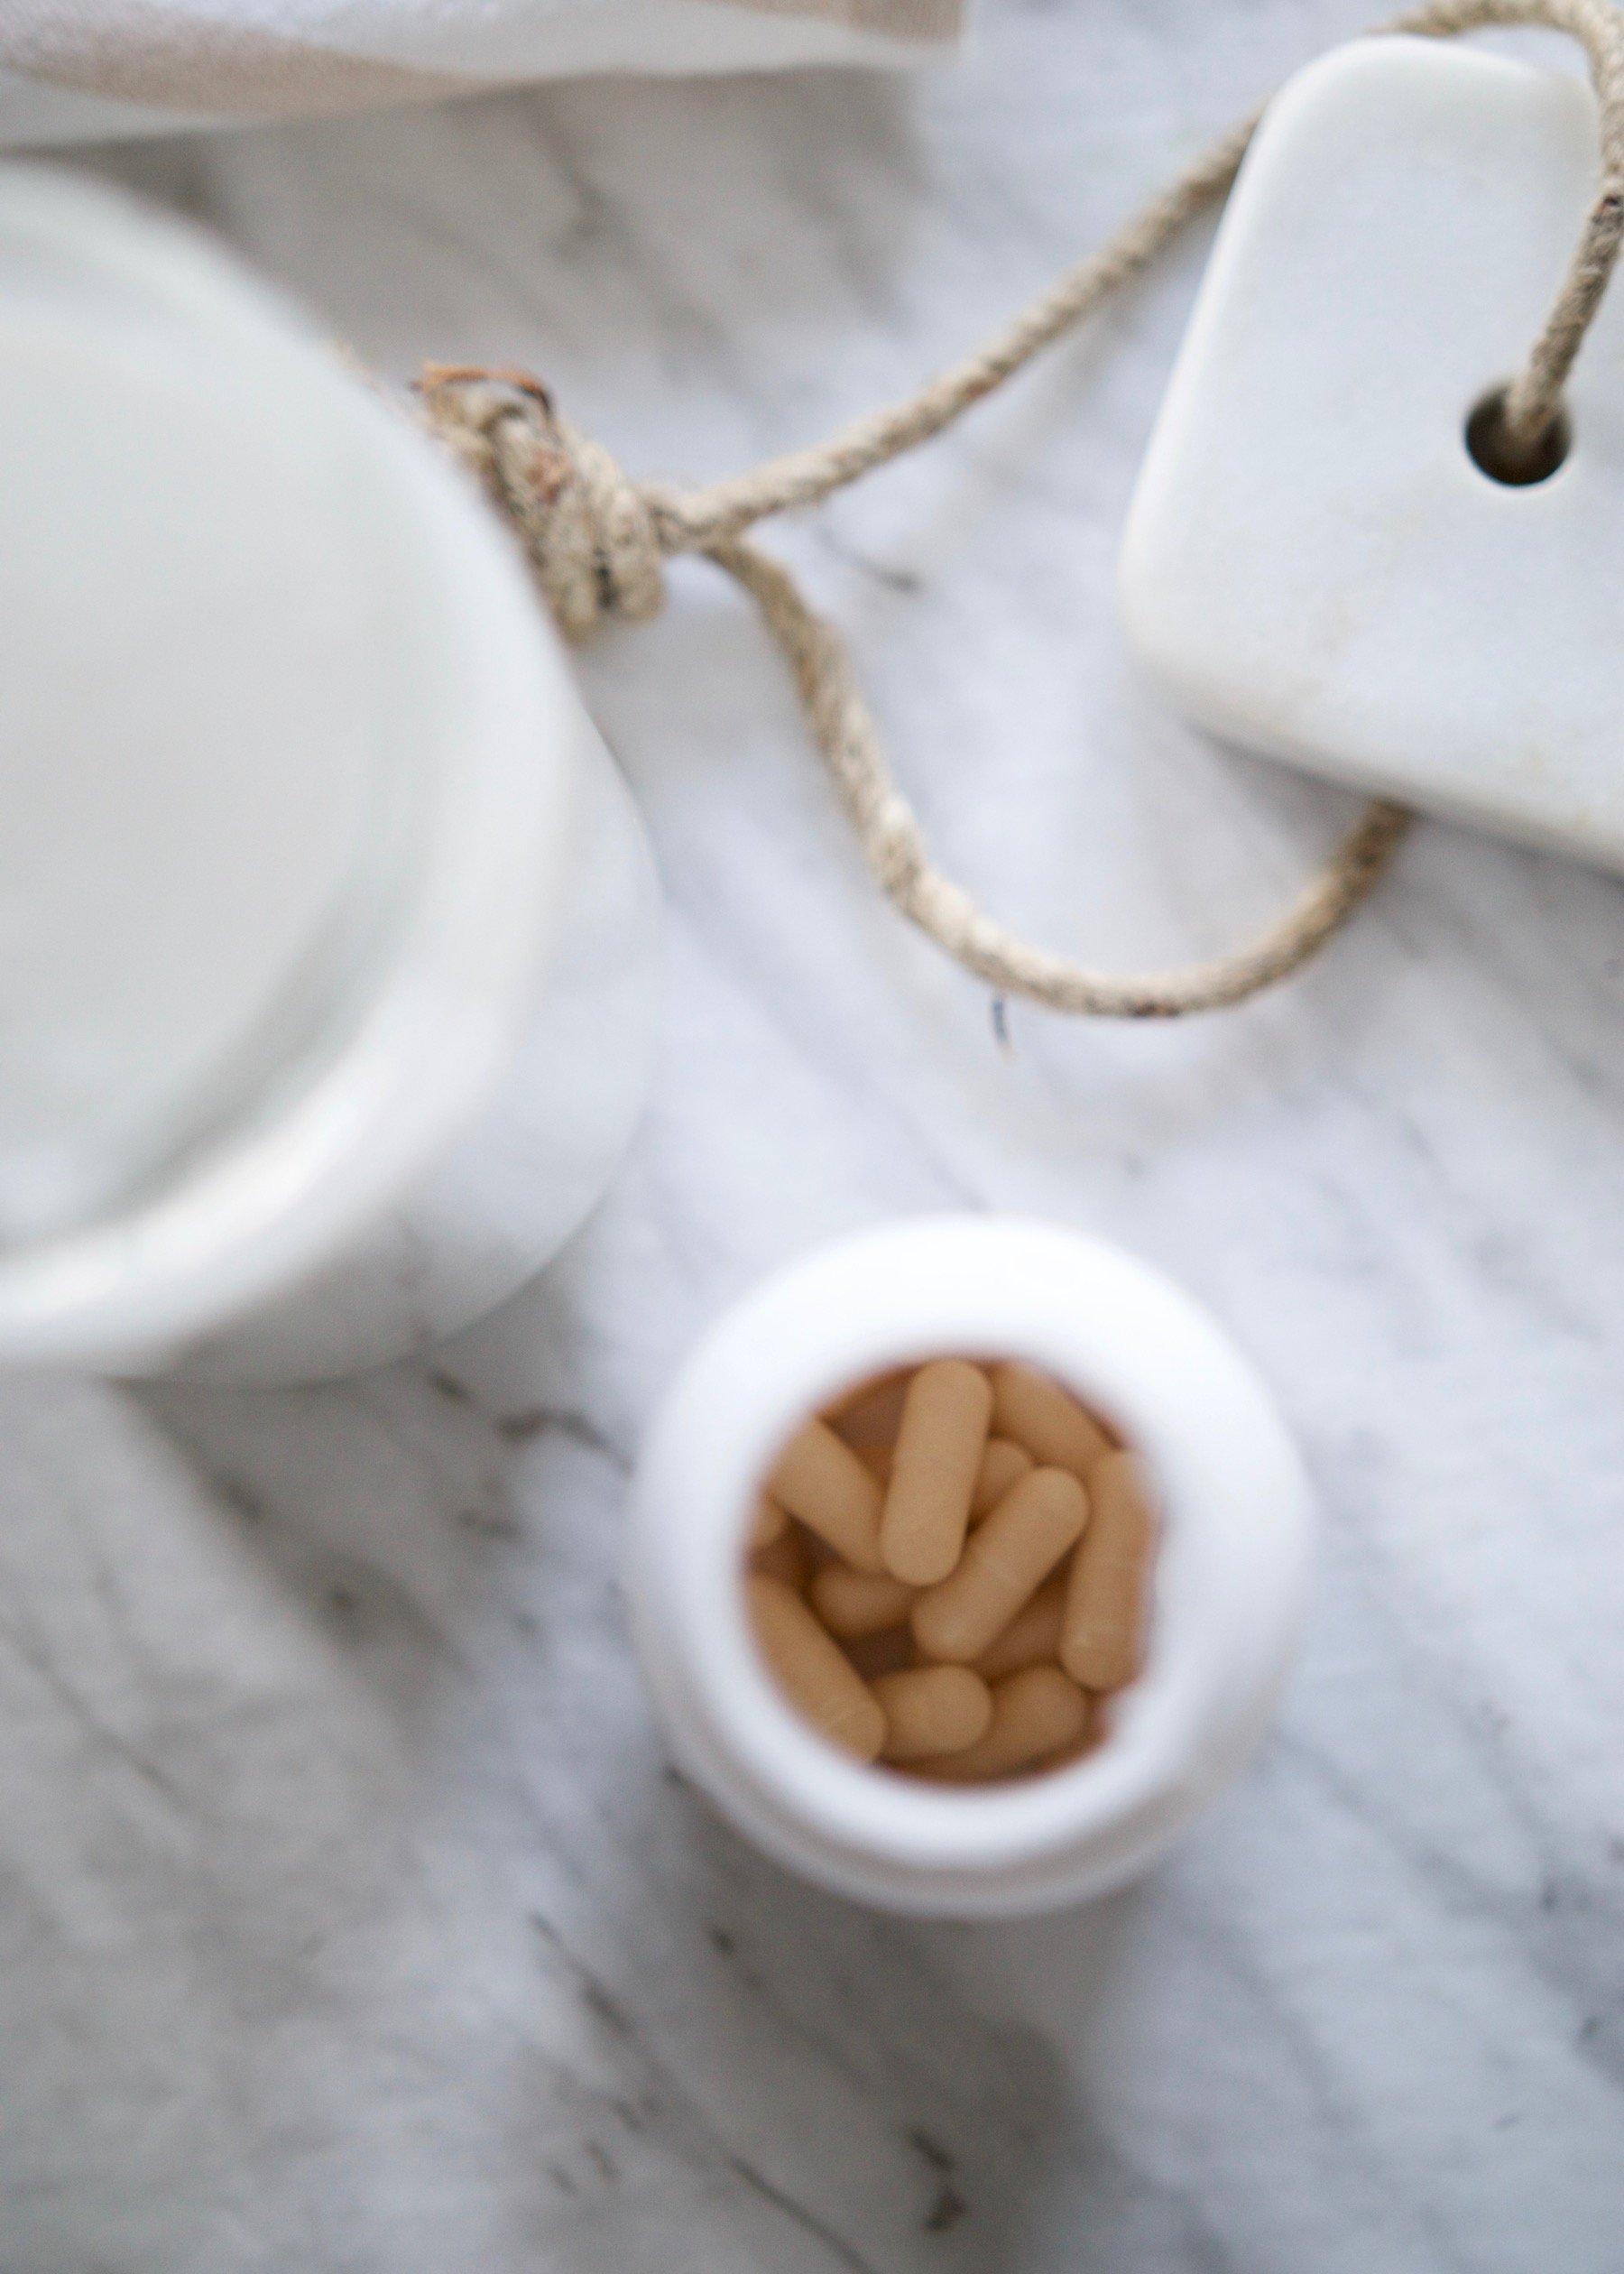
All you need for this recipe is a can of full-fat coconut milk and a probiotic capsule. A variety of probiotic brands should work, but a few good options are Renew Life's Ultimate Flora 50 billion (this is what I have in my fridge right now), Natural Factors Critical Care 55 billion, or Genuine Health 50 billion (this one is 100% dairy-free). All you need to do is open up one of the capsules and pour out the probiotic powder inside. If you try a different brand, look for one that has around 50 billion live cultures also, and report in the comments with how it turns out!
For the coconut milk, I like the pretty standard and easy-to-find brand Thai Kitchen. This one contains some guar gum which is fine, but make sure that you don't use one that has added sugars. Native Forest and Cha's are some other great options. Do not use half-fat or "lite" coconut milks or the liquid beverage kind that comes in a carton.
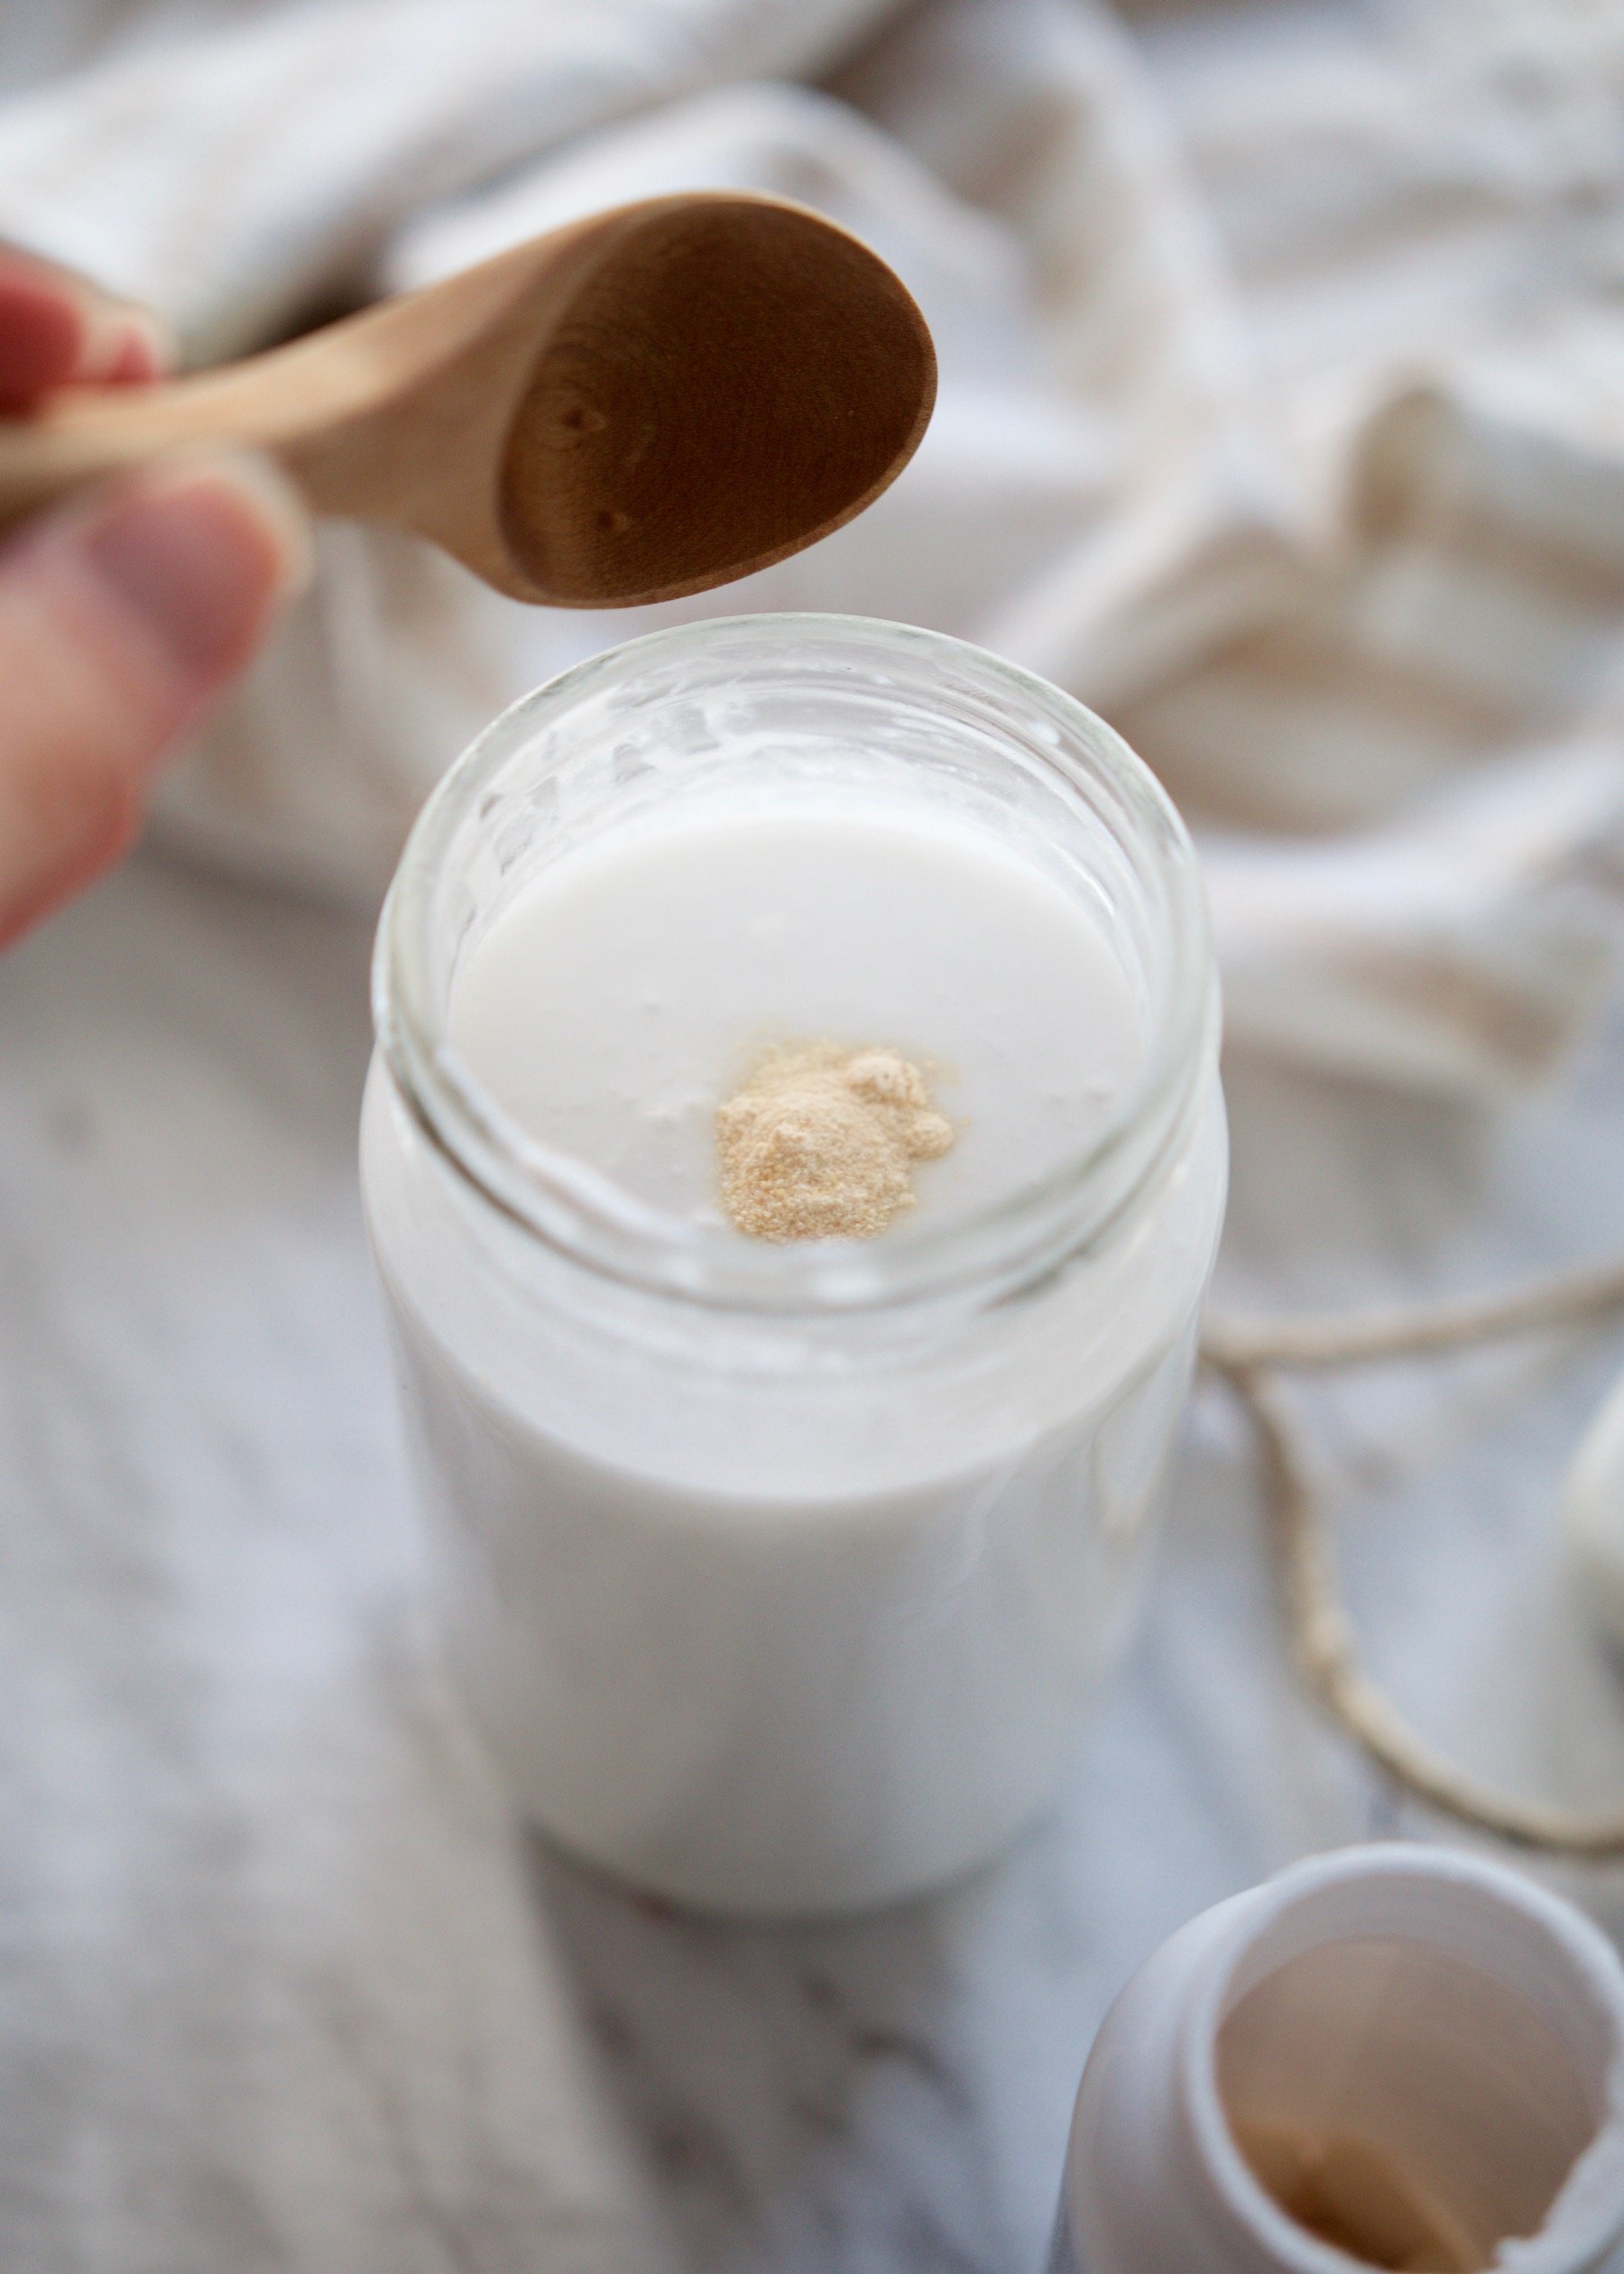
You'll also need a clean, sterile glass container (I use a 500ml mason jar for this recipe), a clean dish cloth or cheese cloth for covering the yogurt while it ferments, and a wooden spoon. Metal spoons can react adversely with the probiotics.
How to Make Coconut Yogurt
Begin by adding your coconut milk to your jar. The cream and liquid may be separated in your can of coconut milk, in which case simply scoop out all the contents (cream + liquid) into a jar and whisk thoroughly until very smooth.
Then, simply pop open your probiotic capsule (you may need to twist and fiddle with it a bit) and pour the powder into the jar! Using a wooden spoon, stir the mixture thoroughly to make sure there are no clumps.
Next, cover with a thin, clean dish towel or cheese cloth and secure with an elastic band. This blocks contaminants from getting in while allowing air to pass through. Do not cover with a tight lid as fermentation gases won't be able to escape!
And finally, let your container sit somewhere at room temperature for 48 hours. For best results you'll want your home environment to be a temperature of least 23 degrees Celcius (around 73F). Warmth is what allows the coconut milk to ferment into yogurt! Alternatively, you can plop the jar into your UNUSED oven with the light on to create a warm environment. But, only do this if you're certain you won't forget about it and end up turning on your oven with it still in there!

After 48 hours (this is the ideal time for a perfectly tangy yogurt!) you can now remove the cloth covering. Now is a good time to check that it doesn't smell bad or have any weird growths — if so, absolutely get rid of it. But you should be good to go! Give it another thorough stir, twist a tight lid on top, and place it in your refrigerator. This will allow it to chill and thicken. It will keep for up to a week in the fridge.
I personally like my yogurt plain and enjoyed with fresh fruit like banana or berries, but feel free to add maple syrup, honey, or vanilla extract once it's finished fermenting!

Homemade Coconut Yogurt
A simple, tangy, 2-ingredient coconut milk yogurt recipe.
★★★★★
4.34 from 3 votes
Ingredients
1 can full-fat coconut milk
1 probiotic capsule
Instructions
Add your coconut milk to your jar. The cream and liquid may be separated in your can of coconut milk, in which case simply scoop out all the contents (cream + liquid) into your jar and whisk thoroughly until very smooth.
Pop open your probiotic capsule and pour powder into jar. Using a wooden spoon, stir the mixture thoroughly to make sure there are no clumps.
Cover with a thin, clean dish towel or cheese cloth and secure with an elastic band. Do not cover with a tight lid.
Let your container sit somewhere at room temperature for 48 hours. Alternately, place jar into your UNUSED oven with the light on to create a warm environment. But do not forget it's in there, and DO NOT turn on the oven!
After 48 hours, check that it doesn't smell bad or have any weird growths. Then, give it another thorough stir, twist a tight lid on top, and place it in your refrigerator to chill and thicken.
Optional: add maple syrup, honey, or vanilla extract once it's finished fermenting! Enjoy with fresh fruit.
Store in refrigerator for up to 1 week.
Troubleshooting
Making homemade yogurt can be finicky. Below are some tips if your yogurt isn't turning out quite as well as you hoped!
Separation -- if your coconut milk is separating, this could be caused by the brand that you're using. I've only tried Thai Kitchen and have had great success with it. If you're using one that has added water, this may be the culprit to runny yogurts or separation.
Not fermenting-- it's very important that the temperature of your room is not too warm or cold to allow for optimal fermentation to occur. For best results you'll want your home environment to be a temperature of least 23F.
Too runny -- make sure that after the 48 hour mark of letting your yogurt ferment at room temperature, you stir it and place it in the fridge to chill and thicken. Another option for creating thicker yogurt is to just use the coconut "cream" portion in your can and discard the liquid. If your canned coconut milk is already combined, refrigerate overnight to separate the cream.
Let me know how your coconut milk yogurt turns out if you give this recipe a try. Happy yogurt-making!